
When I first learned that Outlook allowed me to schedule emails, it completely changed how I communicated. It gave me more control and helped me send messages at the right moment, even when I was away from my desk.
In this guide, I want to take you through everything in a way that feels natural and easy to follow. I will cover how to schedule an email in Outlook on desktop and mobile, so you always know what to do, no matter which device you use.
Let us get in and explore how you can use this feature with confidence and clarity.
How Scheduling Emails Works in Outlook?
When you schedule an email in Outlook, whether it is a promotional email or simply a follow up email, you are choosing a specific time and date for Outlook to send that message for you. Instead of pressing send immediately, you set an automated sending time.
It is helpful when you want to communicate professionally across time zones, when you want to avoid late night emails or when you want to prepare messages in advance without worrying about forgetting them.
Scheduling does not require any special setup. You only need an active internet connection at the scheduled time if you are using Outlook desktop in offline mode. On the web and mobile versions, Outlook sends the message automatically through the server.
Now that you understand the basics, let us explore how to schedule emails across different Outlook platforms.
How to Schedule an Email in Outlook on Desktop?
When you use Outlook on a desktop, you access a built-in feature called Delay Delivery, which allows you to choose when your message will be sent. This feature is simple once you know where it is located, which is why I will guide you through every detail.
1. Open a New Email in Outlook Desktop
- The first step is to open Outlook and click on New Email.
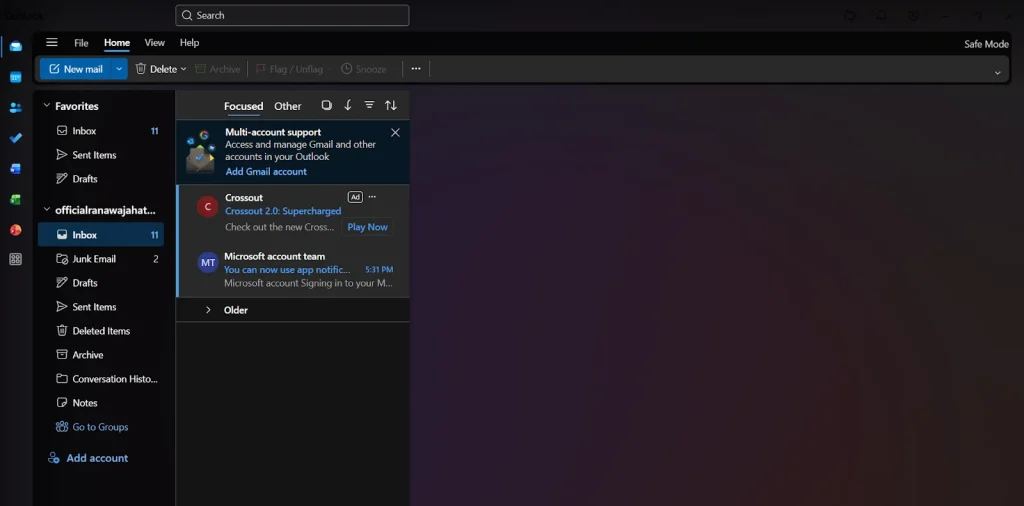
- It brings up the message window where you can start writing your email.
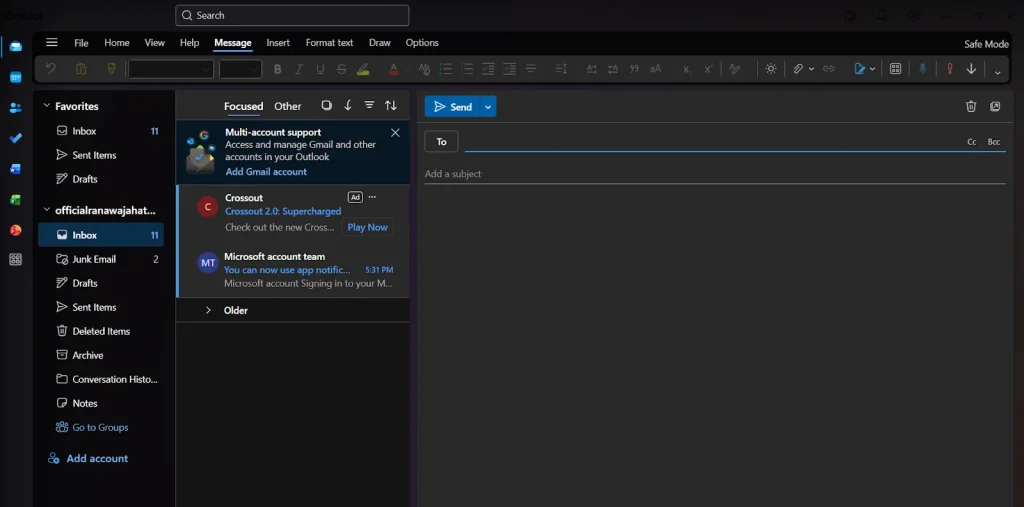
I always begin with the subject and the message to make sure everything looks right before scheduling the delivery.
2. Go to Options and Select Schedule Send
- After writing your message, click on the Options tab located at the top.

- Click on the switch layouts. When you click on it, a new options menu appears.
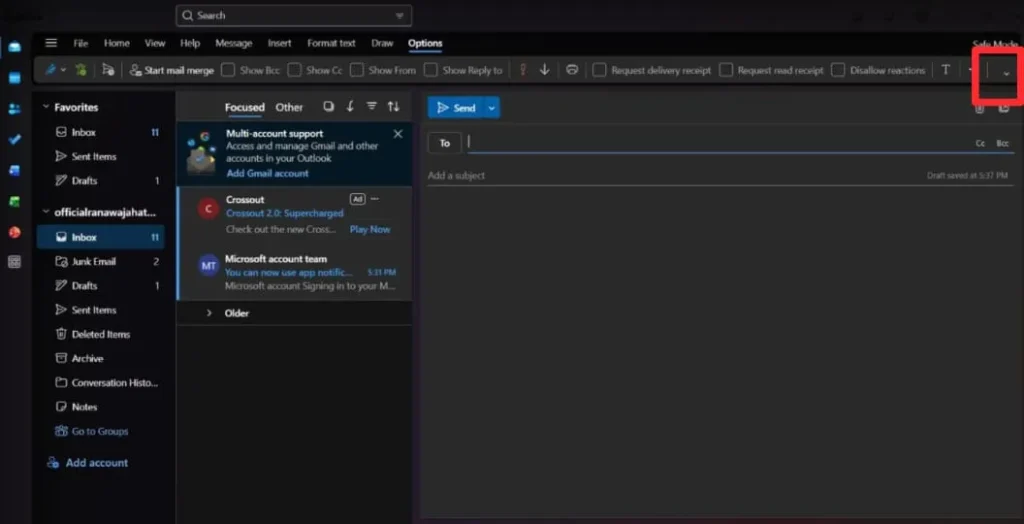
- Click on the Schedule Send option.
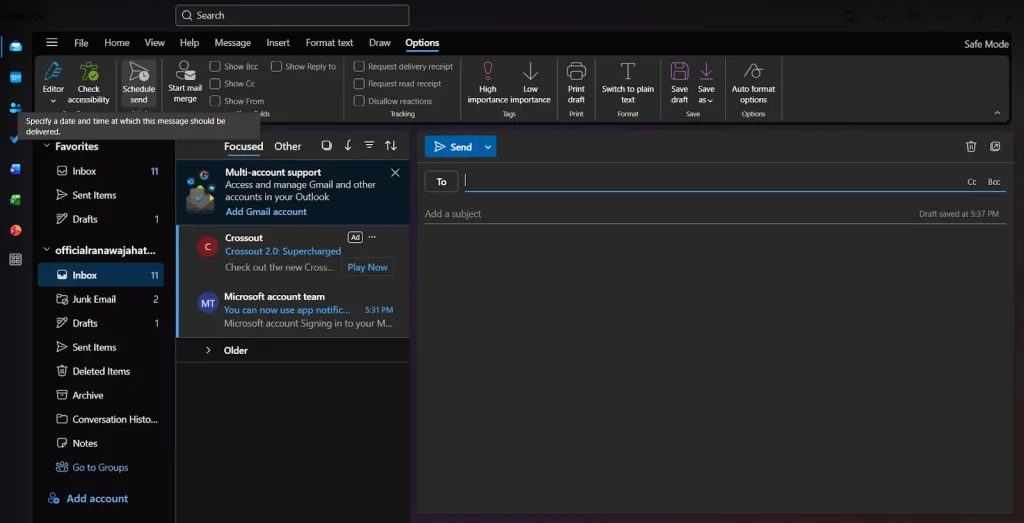
It is the point where you decide when the email will be sent for you, as per your preferences and requirements.
3. Select Your Preferred Time and Date
- After clicking the Schedule Send option, a menu will appear.
- Click on the calendar and select your desired date, then choose the time.
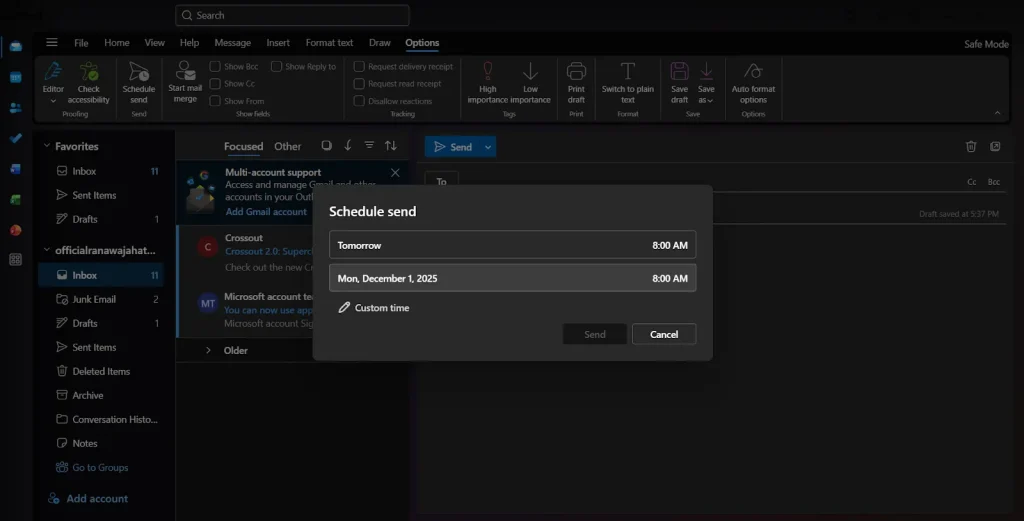
I usually set mine based on the working hours of the recipient so the message arrives when they are most active.
4. Save Your Settings and Send
Once you have selected the time, close the window by pressing Send. The message does not leave immediately. Instead, Outlook stores it in the Outbox until the time arrives. As long as Outlook stays open, the system will send it automatically.
How to Schedule an Email in Outlook Mobile App?
Let me first explain what the mobile version offers. The Outlook mobile app makes scheduling possible with a feature that works very similarly to the desktop app. It gives you a quick and simple way to control when your emails are delivered, even when you are on the go.
1. Open the Outlook App and Start a New Email
- Launch the Outlook app on your smartphone, whether Android or iPhone.
- Tap the new message icon, which is usually at the bottom right corner.
Type your email as usual and make sure everything looks correct, including the recipient and subject.
2. Access the Scheduling Feature
- Once your message is ready, look for the “+” button on the menu board, in the bottom left corner.

- When you tap on it, the app shows additional options that you do not usually see during normal composing.

3. Tap Schedule Send
- Inside the extra options, you will find Schedule Send.
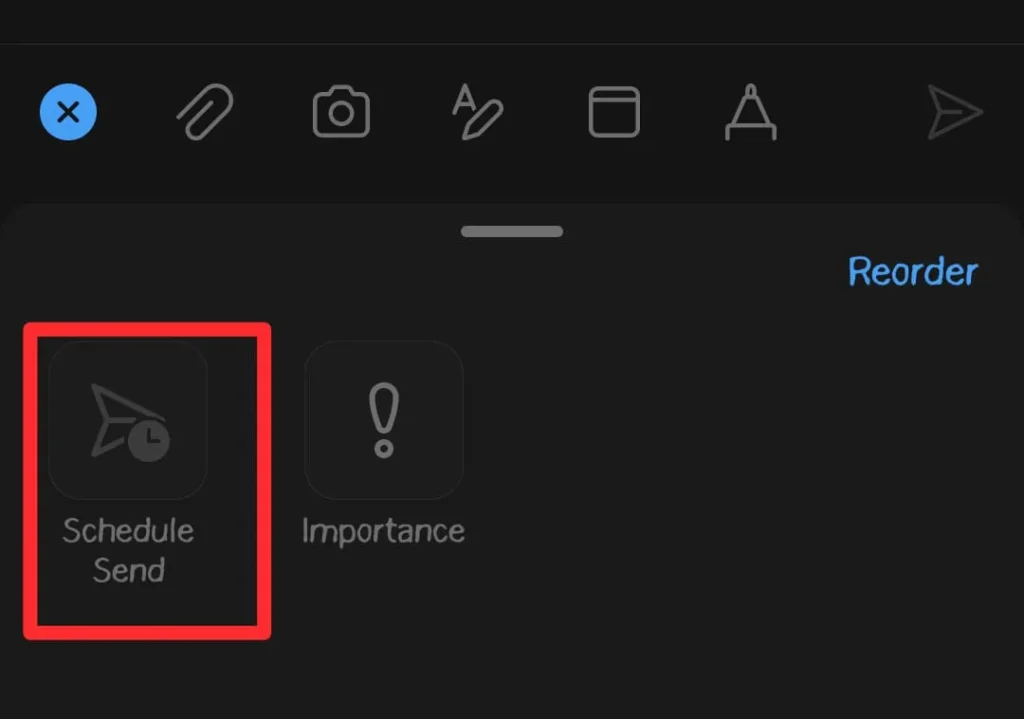
- Tap on it to open the scheduling window.
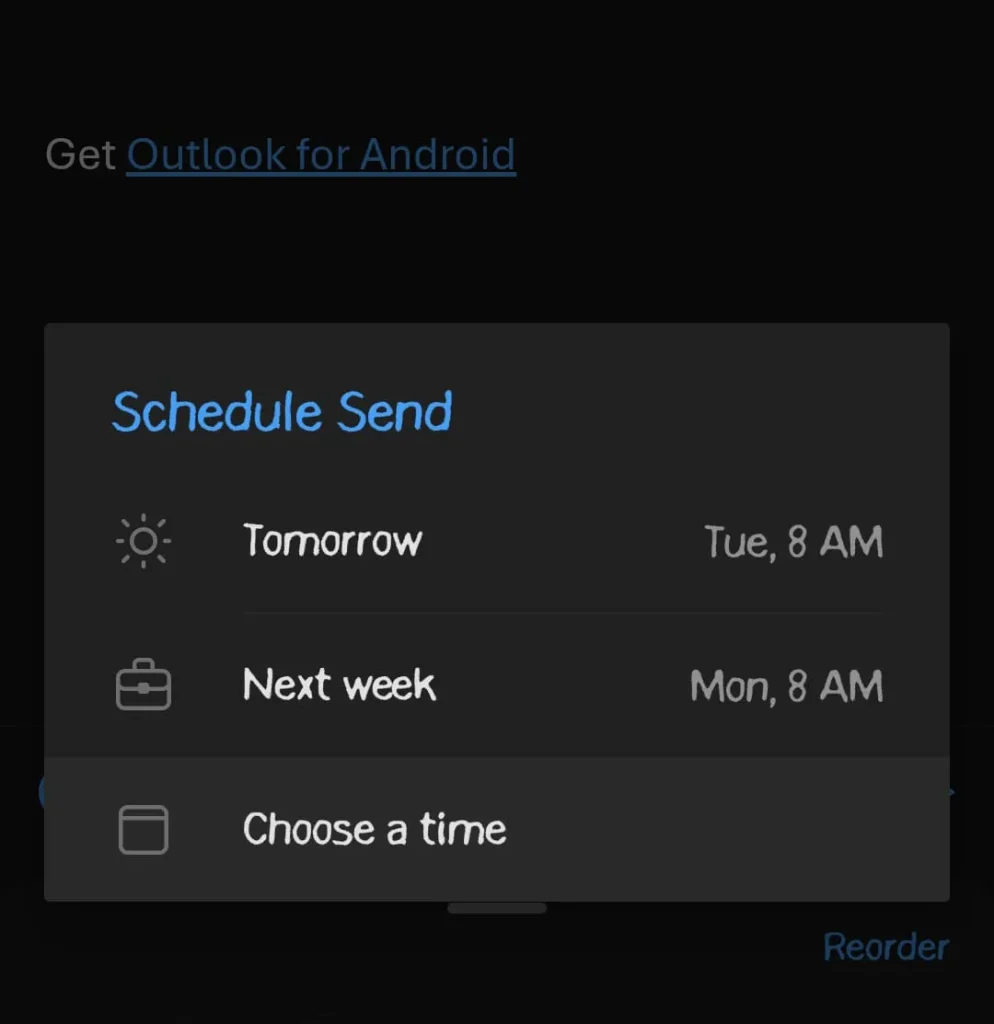
- Here you can select the time and date for sending the email.
I find this helpful when scheduling messages during travel or late night hours.
4. Confirm Your Date and Save
- On the scheduling window, you have to select your desired time.

- After choosing the time, tap on the Schedule button.
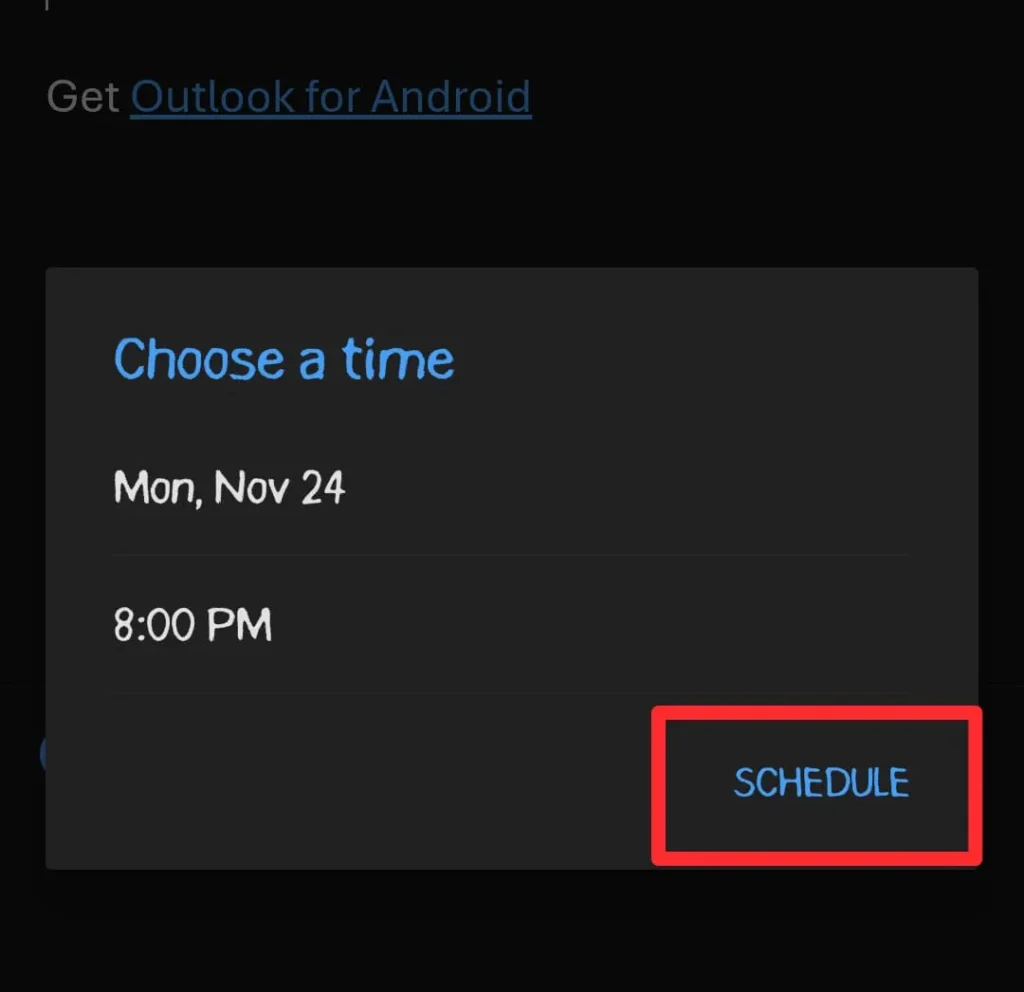
The app will schedule your message, and it will remain in the draft folder, with a scheduled tag until the delivery time arrives.
Final Thoughts
Scheduling emails in Outlook is one of those features that feels small but has a huge impact on how you manage your time and communication. When I first started using it, I realized how much easier it made my routine, especially when dealing with different time zones or preparing messages in advance.
In this guide, I have explained how to schedule an email in Outlook on desktop and mobile so you can use whichever platform suits you best. Once you start scheduling emails, you will feel more organized and confident in your daily workflow. It is a simple trick that creates a big improvement in productivity.
Need custom app with amazing features?
Get a Quote